Wednesday, June 15, 2011

Mammoth Bacon, Egg & Cheddar Sandwich

I saw a version of this sandwich on Man vs Food and it couldn't be helped - I went into the kitchen and made it right away.  Luckily for my own health, but unfortunately for the arteries of my boyfriend, I fed it to him and then went off and ate a granola bar.  A girl has to watch her weight...

Basically, this is a bacon and egg sandwich between two grilled cheese sandwiches.
Ingredients:
4 pieces white bread
4 strips crisp, freshly cooked bacon
3 slices cheddar cheese
1 tbsp butter
2 eggs, fried
Directions:
Melt 1 tbsp of butter in a skillet large enough to hold two sandwiches. Place two slices of bread on top of butter.  Place one slice of cheddar cheese on each slice of bread.  Cover each sandwich with second piece of bread.  After a few seconds, flip the sandwiches and continue cooking until toasted on each side.

While sandwiches are browning, cook bacon slices until crisp.  Drain on paper towels and set aside.

Melt the other tbsp of butter in a second skillet and crack eggs into butter.  Season with salt and pepper.  Once firm, turn eggs over and cook until slightly brown and crisp.

To assemble sandwich, place one grilled cheese sandwich on the bottom, then layer the slices of bacon, the unmelted slice of cheese, two eggs, and the second grilled cheese sandwich.  Hooray!

Tips - On the show, the other ingredient was a full 1/2 pound burger. This seemed dangerously hedonistic, but I would have made it... until I discovered I didn't have any hamburger.  Besides, it was 11 am, a bit early for a sandwich with two different kinds of meat.  Maybe next time!

Monday, June 13, 2011

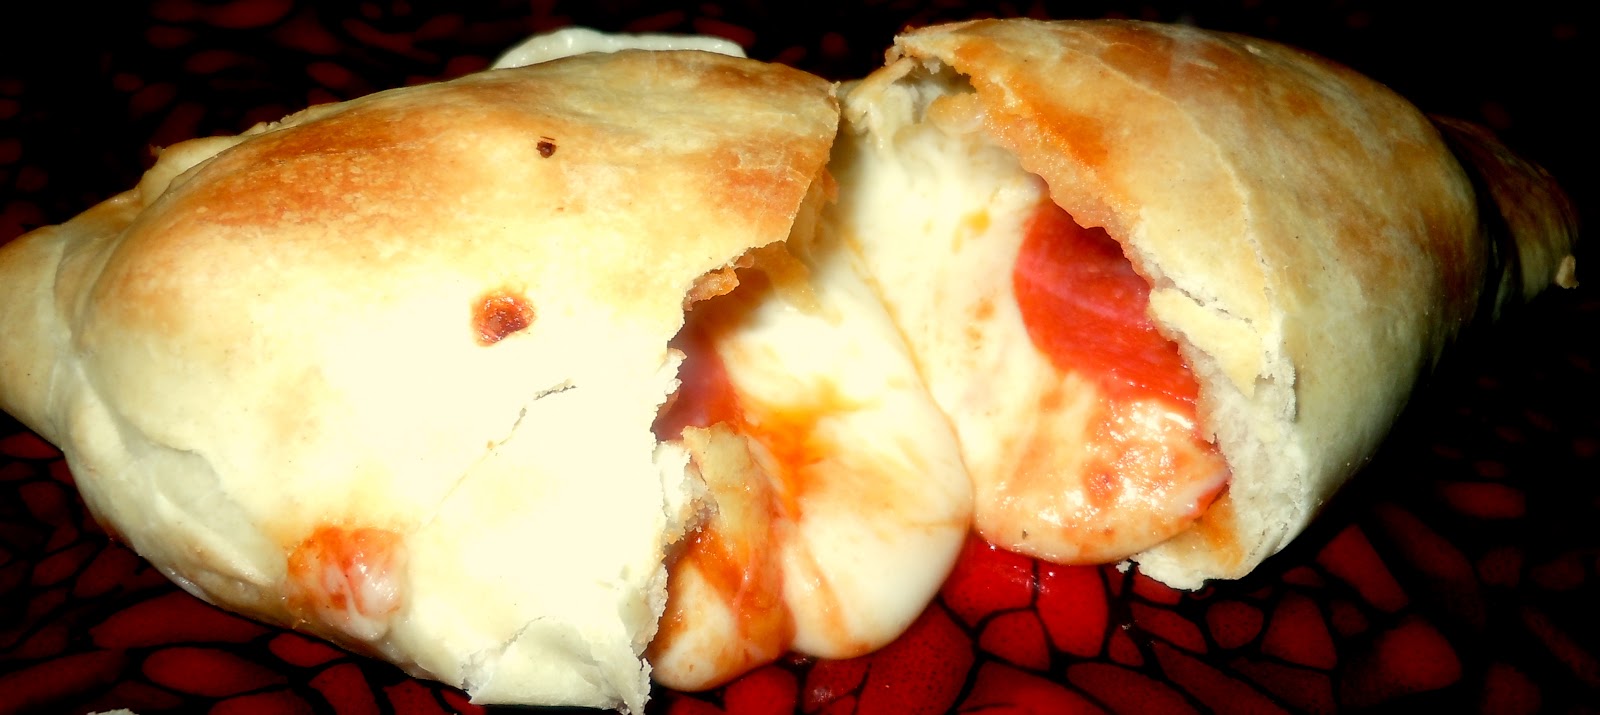
Pepperoni & Mozzarella Calzone

I bought this gadget on a whim.  I'm sure it started as one of those "as seen on TV" products, so I probably should be ashamed of myself. Well, it was cheap and I thought it would be fun to make homemade calzones!
I got the mold from this website for only $6.99, Taylor Gifts Calzone Mold

It actually came with two molds, though I'm not sure why you would ever need two, unless you decided to hire an assistant and start a calzone assembly line!  So, I guess what I'm saying is, I have an extra one, if anyone needs one.

Pizza Dough Ingredients:
2 1/2 cups flour
1 tsp sugar
1 tsp salt
2 tbsp olive oil
1 pkg active dry yeast
1 cup warm water

Pizza toppings (up to you)
1 lb mozzarella cheese
Pizza sauce

Directions:
Mix yeast, sugar, and 1/2 cup warm water.  Let set for about 5 minutes for the yeast to activate.

In a separate bowl, mix flour, salt, olive oil, and remaining 1/2 cup warm water.  Add the yeast mixture and stir until mixed.

Dust a surface with flour and remove dough mixture from bowl.  Knead until smooth, about 5 minutes - the dough should be moist but not sticky.

Place dough into a bowl and drizzle with olive oil.  Cover with a cloth and let the dough stand until it rises, this should take about an hour.

When the dough is ready, preheat the oven to 500 degrees.  Remove the dough from the bowl and divide into small balls.  Each ball should yield enough when rolled out to make a 6 inch round circle of dough.  I ended up with enough dough to make about 6 calzones.
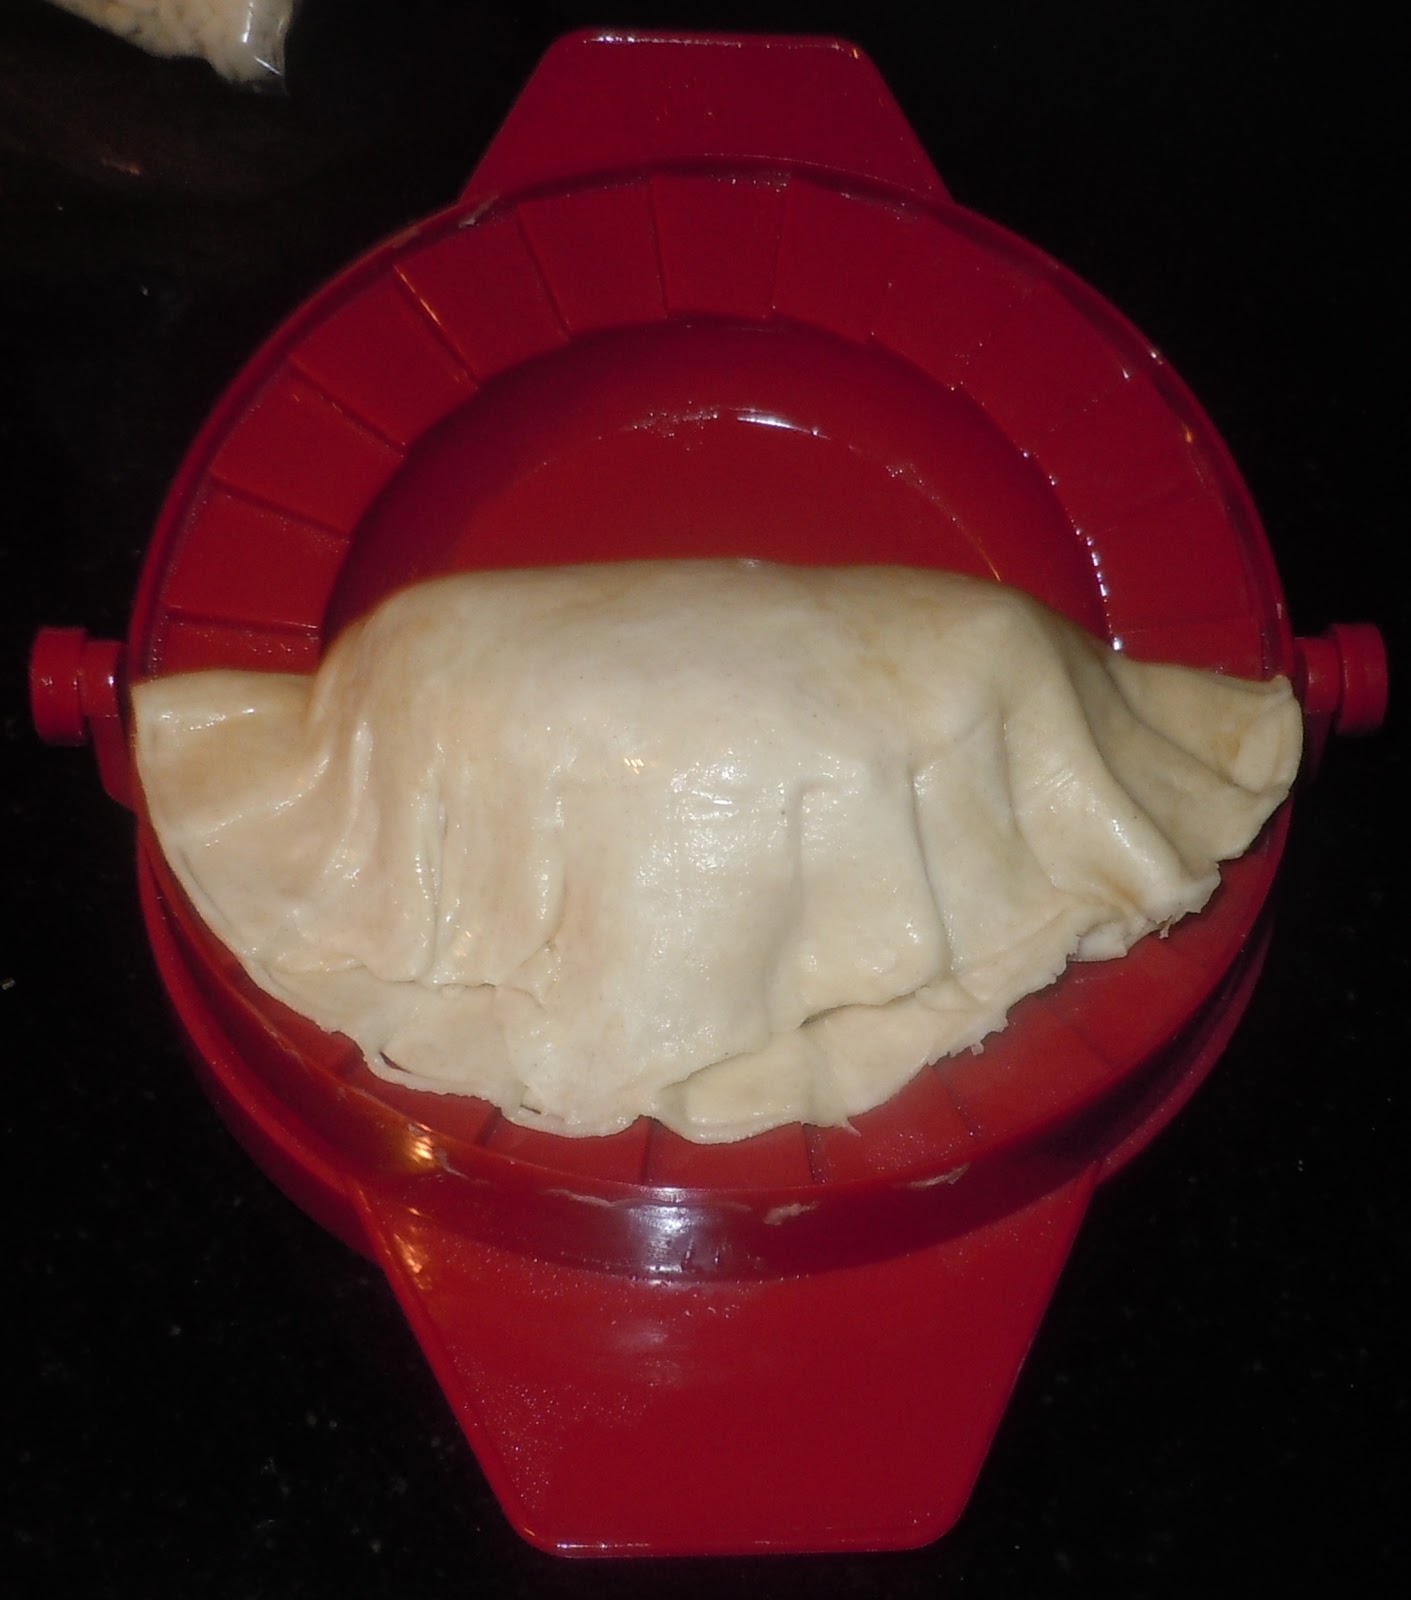
Once you have rolled out your first circle, place it into the mold.  Fill half of the inner circle of the dough with tomato sauce, cheese, and your choice of fillings - I used pepperoni, black olives, and mushrooms.
Fold the mold closed to crimp the edges.  Cut off any excess from the outside. Remove the calzone from the mold, being careful not to open it up.  This was the only place I encountered any trouble - the edges do tend to open, but you can easily squish them back down once you've got the calzones on the baking sheet.  Be sure they are fully closed, otherwise the cheese will spill out and burn on the pan during the baking process.
 Bake the calzones for 10-15 minutes, depending on your oven, until they are nicely browned on top.

Tips:  I think you could easily use this dough recipe without the calzone mold, if you don't want to spring the $7 bucks for the product. I think the only difference would be the crimped edges, and I bet you could do something similar with a knife. Also, a nice touch is to sprinkle parmesan on top at the end.  Just like your local pizzeria!

Sunday, June 12, 2011

Mexican Style Grilled Corn Bruschetta

I found this recipe in a magazine.  I love grilled corn, so I knew there wasn't any way this could go wrong.  It's a delicious and very summery appetizer.

Ingredients:
2 ears corn
1/4 cup crema Mexicana
1/4 cup Cotija cheese
1 tbsp olive oil
1 tbsp melted butter
1 tbsp lime juice
Cilantro (for garnish)

For crostini:
1 loaf French bread
1 garlic clove
3 tbsp olive oil
kosher salt
black pepper

Directions:
Shuck corn, rinse, and drizzle with olive oil.  Sprinkle each side with kosher salt.  Grill on high heat for about 5 minutes per side, turning until corn is nicely browned in parts.  Do not grill for too long, as the corn will become overcooked and chewy.  Remove from grill, set aside to cool.  Note - if you don't have a grill, you can also do this in a grill pan, I have done that and it takes about the same amount of time, maybe a minute or two longer.

Preheat oven to 400 degrees.  Slice French bread diagonally and place on a cookie sheet.  Drizzle each side with olive oil, then sprinkle each side with salt and pepper.  Slice garlic clove in half and rub over each crostini, to impart a little garlic flavor.  Discard garlic.  Place the cookie sheet in the oven for about 5 minutes, just until the crosini are lightly toasted.

While crostini is cooking, slice the corn off the cob in wide strips into a bowl.  After much practice with different implements, I've found the best way to do this is with a bread knife.  Once finished, pour melted butter over the corn, add the lime juice, and mix.

Once the crostini has been removed from the oven and cooled until safe to handle, you can assemble your crostini.  If necessary, reheat the corn.  Using a butter knife, smear crostini with the sour cream, using enough to cover each toast with a thin layer.  Top with about a tablespoon of grilled corn per piece.  Sprinkle with cotija cheese, garnish with a couple of cilantro leaves, and serve.

Tips - This is basically a bruschetta version of the Mexican style corn you can get from street vendors.  For a more authentic flavor, you can sprinkle with cayenne or chili powder.  Also, you could substitute and use mayo instead of the crema - I personally think mayo is gross, but when I served this at a party, I was reminded several times that the street version has mayo!  Enjoy!

Saturday, June 11, 2011

Leah's Spicy Olive & Pepper Infused Vodka

It seems I've become obsessed with infusing vodkas.  It's just so delicious, so simple, and the bottles turn out so lovely!  Kyle says I've turned our home into a distillery, and I'm not sure if that is a compliment or an insult.

My latest effort was a spicy olive vodka.  I layered olives, pearl onions and an assortment of sweet and spicy peppers in a jar.  I wanted to recreate something that my friend Kara had told me about - she had it in a martini at a bar, and said it was delicious.

I got my jars super cheap on Crate & Barrel's website, but they can be found all over the web (or in your local grocery store).  The nicer ones are harder to find at the store, so I've been buying them online.  Here is the specific jar I used for this recipe:


This recipe will make two bottles, so if you want just one, simply half the ingredients.

Ingredients:
2 one liter airtight jars
1 20 oz jar green olives (I used queen, with pimentos)
1 16 oz jar cocktail onions (not the tipsy ones, since you'll be adding your own liquor)
1 16 oz jar yellow & red sweet roasted peppers
1 16 oz jar hot cherry peppers
1 8 oz jar guerito peppers
1 tbsp lemon juice
1 1.5 liter bottle of vodka (I used Svedka because it was on sale!)

Directions:
Simply layer the ingredients however you want!  I chose to alternate to showcase the colors, but there is really no right or wrong here.  Next time, I am planning to try different types of olives and adding a few pickle spears for a more sour and salty mix.  Also, be sure to fill the jar all the way to the top before adding the vodka.  There will still be plenty of room, and it will make for a nice presentation and more intensely flavored infusion.

As far as the heat, I only used about half the jar of guerito peppers, but all of the rest of the ingredients from above, and mine came out spicy, but not hot.  This is totally a personal preference, so you may want to experiment with the number and types of peppers.

Once you have filled the jar with vegetables, add 1/2 tbsp lemon juice per bottle, fill to the very top with vodka, and place the lid on.  Be sure to close tightly.  Shake the bottle a couple of times per day to invigorate the ingredients.   I let mine marinate for about 36 hours and it was already tasty, but I'm sure it will taste even better in a week or so.  Store the vodka in a cool place, out of direct sunlight, and it should last for several months.
Serve with a bit of vermouth for a vodka martini, mix into cocktails, or try it in a Bloody Mary.  Yum!

Tips:  The marinated vegetables make great garnishes, as they are infused with flavor as well.

You can use fresh peppers if you prefer, but you will need to remove all of the seeds, membranes, and stems before adding, as those interior bits can disintegrate and give your infused liquor a bitter taste. Also, if you want a stronger olive flavor, I suggest getting a slightly larger jar of olives.  The olive flavor is primary in this version, but the peppers are strong as well.  Enjoy!

Friday, June 10, 2011

Chicken Meatballs with Peanut Sauce

Personally (as you can see from my blog!) I am not a very big fan of chicken, unless it's heavily spiced, marinated, wrapped in bacon, or served with a sauce...  However, these meatballs were quite tasty, having at least two of the above requirements taken care of.

Ingredients:

For meatballs:
1 lb. ground chicken
1/2 cup chopped cilantro
1/4 cup dried breadcrumbs
2 cloves garlic, chopped
1 tsp. salt
1 tsp. onion powder
1/4 tsp cayenne pepper
1/2 tsp. pepper
2 tbsp. vegetable oil
 
For Sauce:
1/4 cup peanut butter
2 tbsp. soy sauce
3 tbsp sugar
3 tbsp sesame oil
 
Chopped peanuts, for garnish

Directions:

Mix chicken, cilantro, breadcrumbs, onion powder, garlic, salt and pepper; roll into 1 tbsp. balls.  In medium skillet, heat oil over medium heat.  Add meatballs and cook through, 6 to 8 minutes, turning frequently until brown on all sides.  Remove from heat as they are cooked and drain on paper towels.
Whisk remaining ingredients (except peanuts) in a bowl and warm in the microwave.  Toss the meatballs with half of the sauce and sprinkle with peanuts.  Serve on toothpicks with remaining sauce for dipping.

Tips -  If you think you may have leftovers, store the sauce and meatballs separately, otherwise they will get soggy.  Enjoy!

Thursday, June 9, 2011

BBQ Pork Ribs with Apple Bourbon Sauce

 
This was my first time making this recipe - I thought it was pretty tasty, and a nice change from standard BBQ sauce.  Summer grilling experiment time is here!

Ingredients:
1/2 cup hickory, apple or maple wood chips (soak for 30 mins beforehand)
4 pounds baby back or spare pork ribs

For rub:
2 tablespoons brown sugar
1 tablespoon kosher salt
1 tablespoon sweet paprika
3/4 teaspoon garlic powder
3/4 teaspoon onion powder
3/4 teaspoon ground cumin
1/2 teaspoon ground mustard
1/2 teaspoon freshly ground black pepper

For Apple Bourbon BBQ Sauce:

2 tablespoons butter
2 coarsely grated peeled Granny Smith apples
3 tablespoons bourbon (I used Jack Daniels)
1/2 teaspoon salt
1/2 teaspoon onion powder
1/4 teaspoon cayenne pepper
2 cups ketchup
1/2 cup distilled white vinegar
3/4 cup brown sugar
3 tablespoons soy sauce
3 teaspoons liquid smoke

To make the sauce:
In a medium saucepan, melt the butter. Add the apple and cook until the moisture has evaporated, about 3 minutes. Add the bourbon and cook until nearly evaporated, about 3 minutes. Stir in the remaining sauce ingredients and bring to a boil. Simmer over low heat for 5 minutes.

For ribs:
First, you'll need to prepare your rack.  Bring the ribs to room temperature, rinse, and remove the membrane from the back.  The membrane blocks the intake of smoke into the meat, and creates a barrier to your seasonings.

To remove the membrane, lay the ribs on a flat surface, meat side down. Take a sharp knife and begin peeling the membrane from one corner near the bone. From there, you should be able to get a good grip and begin pulling.  If the membrane is intact this will just take a few seconds, if it comes off in pieces, it may take a bit longer.

Now, preheat your grill to 200 degrees.  Drain the wood chips.  If you have a smoker box (you can buy one at Target for about $10 bucks), you can use that - if not, wrap the chips in foil, pierce the packet all over and add to the back of the grill.  Alternately, you can use a cheap aluminum pan (such as one you would buy to roast a turkey) and just cover that loosely in foil.  Once you have your chips on the grill, close the lid and let the chips begin to smoke, about 5 minutes.

To make your rub, 
combine the dry rub ingredients and rub the spice mixture all over the ribs.  Let stand for 5 minutes. 
Grill the ribs over indirect heat for 1 1/2 to 2 hours, turning occasionally, until they are lightly charred and cooked through.  Baste the ribs with sauce (make sure to reserve some for later!) several times throughout the cooking time.  Once you feel the ribs are tender (or you just can't wait anymore!), turn the heat up on the grill to high, place the ribs directly on the grill, and cook for about 3-4 minutes per side, until you get a nice char.

Transfer the ribs to a platter and serve with the reserved barbecue sauce.

Tips - You really can't overcook ribs (as long as you don't burn them), so you could leave these on longer to make them even more tender.  Also, if you are too lazy (or busy!) to make the BBQ sauce entirely from scratch, you can omit all of the ingredients besides the apple, bourbon, and butter and simply add 2 1/2 cups of store bought BBQ sauce to the cooked apple mixture.

Finally, I pureed this in my food processor because I wanted a smooth texture, but the recipe actually called for it to be chunky.  That's up to the chef!  Enjoy!

Peanut Butter Cup Banana Bread

I was making banana bread one day, when I thought, why not throw in some peanut butter cups? As we all learned from Elvis, peanut butter and banana go great together!

Ingredients:
4 ripe bananas, smashed
1/3 cup melted butter
3/4 cup sugar
1 egg, beaten
1 teaspoon vanilla
1 teaspoon baking soda
Pinch of salt
1 1/2 cups all-purpose flour
8 full size Reese's Peanut Butter cups, cut into quarters

Directions:
Preheat the oven to 350.  With a wooden spoon, mash bananas in a bowl, then add butter and stir. Mix in the sugar, egg, and vanilla.  Next, add the baking soda, salt, and flour.  Stir in Reese's cups, then pour mixture into a buttered loaf pan.

Bake for 1 hour, then cool.  Remove from pan and slice to serve.

Wednesday, June 8, 2011

Grilled Flank Steak with Chimichurri Sauce

This is one of my favorite things in the world - grilled steak, spicy sauce, how can you go wrong? The sauce is actually quite easy to make and is good on a variety of things (you could also serve it on pork, or with pretty much any type of steak).

Ingredients:

1 1/2 pounds trimmed flank steak
1 1/2 teaspoons kosher salt
1/2 teaspoon ground cumin
1/2 teaspoon ground coriander
1/4 teaspoon black pepper
3 garlic cloves
1 1/2 cups fresh cilantro
1 1/2 cups fresh flat-leaf parsley
1/4 cup distilled white vinegar
1/3 cup olive oil (sauce) + 1 tbsp for steak
1/4 teaspoon cayenne

Directions:

Preheat grill to high.  Pat steak dry.  Drizzle on both sides with the tablespoon of olive oil.  Stir together 1 teaspoon salt, cumin, coriander, and pepper in a small bowl and sprinkle mixture onto both sides of steak. 

Grill steak on high for 3 minutes per side for medium-rare. Transfer to a cutting board and let stand 5 minutes to rest.

Using a food processor or blender, add cilantro, parsley, vinegar, oil, cayenne, garlic cloves, and remaining 1/2 teaspoon salt, then pulse until herbs are finely chopped.  Taste the sauce and add more salt or spice, if necessary.

Slice the steak thinly, along the grain, and serve with the sauce.